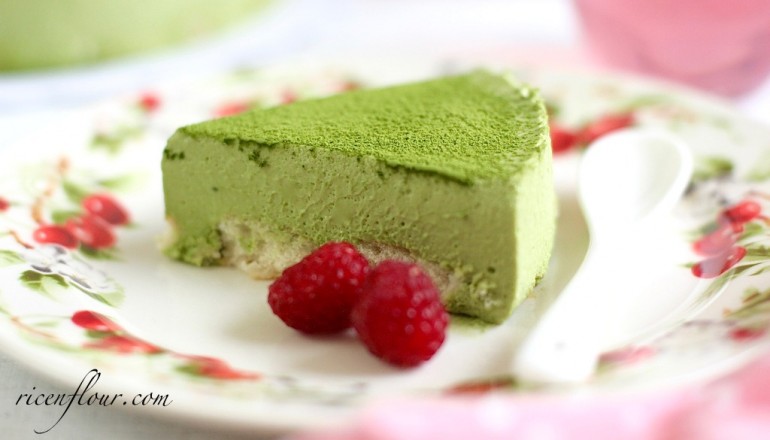
Calling all green tea lovers, have you had your green tea fixed today? If not, this no-bake matcha cheesecake is waiting for you. Matcha may be a new thing for the Western world, but it is in fact ancient. It has been the heart of the famous Japanese tea ceremony for over 900 years and is well-known for its unique flavour and remarkable health benefits. Matcha has just recently gained recognition world-wide and food enthusiasts are discovering new uses for it every day: matcha latte, matcha mousse, matcha cake, matcha ice cream, etc. you name it!
I myself am also a green tea lover. Sweet and grassy with an earthy and slightly bitter flavour, it is just so natural and refreshing. What makes it even a better? The combination of the earthy matcha and the light, cool and creamy cheesecake! Deadly, deadly combo! You will be enjoying this delicious twist on the classic no-bake cheesecake as much as I do. And for those who haven’t heard of matcha? Come on, try it out, you are behind!

NO-BAKE MATCHA (GREEN TEA) CHEESECAKE RECIPE
Yield: 1 cheesecake that is 18-cm in diameter and 4 – 5 cm in height
Tool: One 18-cm (7 inches) spring form pan or 18-cm mousse ring
INGREDIENTS
- 4 gram powdered gelatin (or 2 sheets) – do not substitute with agar agar powder or any kind of jelly powder
- 25 ml (5 tsp) cool water
- 2 egg yolks (18 – 20 gram/yolk)
- 30 gram (2.5 tbsp) caster sugar
- 10 gram (1 tbsp) all purpose flour
- 50 ml (3 tbsp + 1 tsp) milk, lukewarm
- 50 ml (3 tbsp + 1 tsp) whipping cream (30 – 40% fat), lukewarm
- 8 gram (4 tsp) matcha/ green tea powder
- 20 ml (4 tsp) boiling water
- 200 gram (7 oz) cream cheese, softened at room temperature
- 20 gram (1.5 tbsp) caster sugar
- 120 ml (1/2 cup) cold whipping cream (30 – 40% fat)
- 10 – 12 ladyfingers
- 50 ml (3 tbsp + 1 tsp) milk
INSTRUCTIONS
A detailed recipe with all the specific notes is available on Savoury Days’ YouTube Channel (subscribe to get all the newly uploaded recipes). You can check it out at this link or the video right below. Don’t for get to choose HD setting for highest quality.
PRINTABLE RECIPE
1. Soak gelatin in 25 ml (5 tsp) water for about 10 – 15 minutes, until soft.
2. Whisk egg yolks and sugar until thick, fluffy and pale. Sift in flour and mix well. Gently pour in milk and whipping cream (both lukewarm) and stir. Run the mixture through a sieve into a small saucepan.
3. Cook the mixture on medium heat and stir continuously. When it thickens, remove from heat, stir a little more; then add in the soften gelatin. Stir until gelatin has completely dissolved and fully incorporated into the mixture. Strain it through the sieve again and remove lumps if any. Pour the mixture into a bowl. Let it cool down a little, then cover it with plastic wrap. Make sure the wrap touches the surface of the custard to prevent milk proteins from forming a crust on top when refrigerated.
*Note: If the custard has already thickened but it has the taste of raw eggs or raw flour, it is because it was cooked at too high temperature, which causes too much liquid evaporation before the mixture is fully cooked. How to solve: Add in some more milk or whipping cream so that the mixture dilutes out, continue cooking at the lowest heat while stirring continuously until the custard is cooked.
4. Whisk matcha powder in boiling water until we have a thick matcha paste.
5. In a bowl, add in cream cheese, 20 gram sugar and the matcha paste in step (4). Beat at the lowest speed for 1 – 2 minutes until well-blended and smooth. Note: cream cheese needs to be at room temperature, otherwise it will be lumpy when beat.
6. Add in ½ of the cooled custard mixture into the bowl and beat it together with the matcha cream cheese mixture from step (5). When the mixture is well-blended, add in the remaining half of the custard, and mix until fully incorporated.
7. In another bowl, beat whipping cream until soft peaks form. Divide it into 2 parts and simultaneously add it into the cream cheese custard mixture, gently fold until well-incorporated. You should have a a pale green mixture that appears soft and smooth.
8. Line the bottom of your pan.
9. Brush off some of the sugar on the ladyfingers. Dip both sides of the ladyfingers into a bowl of milk, then arrange them into a layer at the bottom of the pan. Note that the dipping motion should fast, otherwise the ladyfingers will soak up too much liquid and become too soggy. On the other hand, if we skip this step, the ladyfingers will be too dry and become stale when left in fridge.
* You can replace this ladyfingers layer with a layer of cookies crumbs such as Oreo or digestive cookies. Normally, for a 18 cm pan, I use 12 Oreo cookies (crushed) and 40 gr melted butter.
10. Pour the matcha cream cheese mixture into the pan, gently swirl it around so that the mixture becomes evenly flat. Leave pan in the fridge for at least 4 hours or until it is fully set. Store in fridge and use in 2 days. Note: the mousse will turn soft and become runny pretty quickly at temperature above 30˚C, thus make sure when it is taken out of the fridge, it is to be served right away.
11. When served, run a thin knife along the side of the pan and take the cheesecake out. Dust some matcha powder on top right before serving.


JOIN US